![How to Debug a Motherboard? Guides [2024]](https://www.ingameloop.com/wp-content/uploads/How-to-Debug-a-Motherboard-1.jpg)
Debugging is locating and fixing software code problems that could lead to unexpected behavior or crashes. These errors are sometimes referred to as “bugs.” Before digging deep into the topic of How to Debug a Motherboard, you must know that debugging is a process used to identify and fix faults or flaws in software or systems so that they don’t operate incorrectly. A user must start with an issue, find its source code, and then repair it to debug a program. Motherboard debugging is a way to remove or correct any fault in the motherboard.
The primary printed circuit board in a computer is called the motherboard. All parts and route devices are connected to a computer’s motherboard, which serves as its primary communications hub. In essence, the board is what connects every component of the PC. An electrical circuit board and computing core, a motherboard, is the largest board in a PC frame. If you want to know more about what motherboard debugging is and how to debug a motherboard, then you are at the right place so keep on reading
Key Takeaways
- Debugging a motherboard is the process of identifying and fixing the cause of a problem or error that prevents the system from functioning properly.
- Debugging a motherboard can be done by using various tools and methods, such as a debug LED, a beep code, a POST card, a multimeter, or a visual inspection.
- Debugging a motherboard requires following some steps, such as checking the power supply, removing any unnecessary components, resetting the BIOS, testing the RAM and CPU, and updating the drivers and firmware.
- Debugging a motherboard can help resolve issues such as no display, no boot, no power, no sound, no network, or blue screen of death (BSOD).
- Debugging a motherboard can be challenging and time-consuming, and it may not always be successful. Users should backup their data and consult a professional if they are unsure or unable to fix the problem.
Steps to Debug a Motherboard
Have you ever tried fixing a motherboard and found that the problem won’t go away no matter how hard you try? It’s tough to diagnose a computer issue on your own. Today we’ll walk through some basic steps to Debug a Motherboard; you’ll be able to take care of it yourself. The most used way of debugging a motherboard is by using the debugging card.
Debug by using debugging cards
Motherboard diagnostic cards, also known as PCI POST cards, are electronic devices that fit into the PCI or ISA slots, or sometimes a USB port, from where they can analyze hardware issues and BIOS faults. Motherboard diagnostic cards can help technicians quickly pinpoint the cause of system errors or hardware faults.
How to use debugging card?
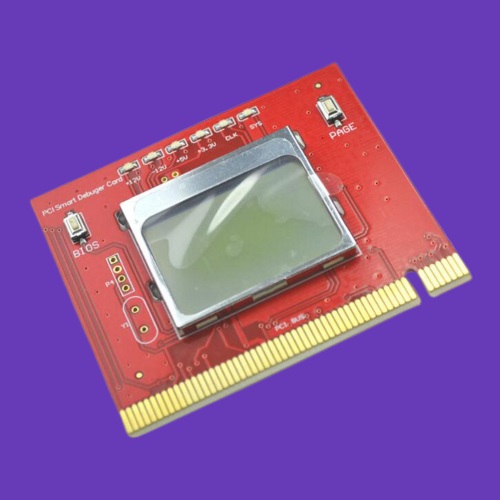
Large computer diagnostic cards are easy to use, with many offering plugs and immense simplicity. Here is how motherboard diagnostic cards are used.
- Switch on the computer, then insert the card into the PCI, ISA, or USB port that is accessible.
- Search for failure messages on the card’s display. The machine will perform the POST (power on self-test) upon system startup. The computer checks which components are installed and how well they function. The diagnostic card will stop and display an error code that describes the defect it has discovered if a test fails.
- Refer to the POST card’s related literature to determine what the code signifies. Typically, it contains a list of all the codes the diagnostic card recognizes and an explanation of the error’s potential causes.
What are postcodes
The hexadecimal code should display the various POST codes as the system runs when the computer is turned on. If the computer does not boot, system POST has terminated after identifying a fatal error. The diagnostic test that POST failed is determined by the number displayed in the hexadecimal display on the diagnostic card.
Important parameters for diagnosing motherboard issues
Follow the Complete Process to Debug your Motherboard
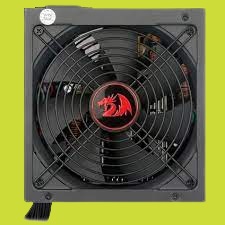
- Is there electricity going to the motherboard?
To see if the fan is running, check the power source.
- For accuracy, check the BIOS/UEFI settings.
Make sure to check all the Settings in BIOS

- For Overheating Evaluation
Turn off the computer’s power and give it time to cool. Remove the computer’s cover and turn it on.

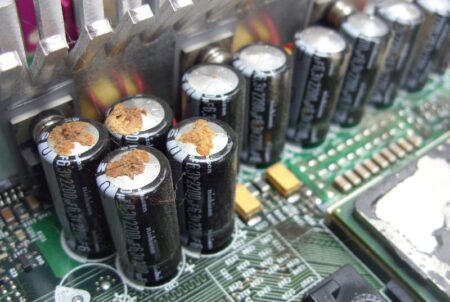
- Look for Inflated Capacitors
Be sure to look for inflated capacitors on the motherboard. These are tiny parts that could seem to be swollen. If seen, swap out the motherboard right away.
- Reinstall the RAMs, Adapters, and CPU
Make to reinstall RAMs, CPU and Adapters etc

- Switch off all Useless Adapters and Input/Output Devices
Make Sure to unplug all the Useless Adapters along with I/O Devices before starting the computer.
- Try Different Power Supply
Power Supply could become faulty due to short circuit so its better to try a different PSU

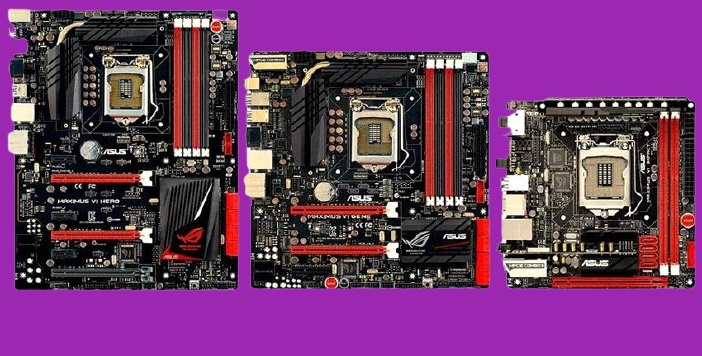
- To find out if the motherboard is shorting out on the frame
- Verify the CMOS Battery

- Check the output on a motherboard equipped with debugging LEDs for any fault codes.

Conclusion
The most typical motherboard-related problems are covered in this article as a broad overview. The most challenging problems to fix are generally power and motherboard issues. The motherboard contains many components; hence, various things can lead to faults. One of the most helpful tools for motherboard troubleshooting is POST (power-on self-test). Any codes that appear on the screen should have their meanings looked up. So, we went into various points about how to debug a motherboard, as it’s quite a complicated process.
Naturally, each arrangement will have its oddities; therefore, mistakes might be particular and challenging to identify when using broad materials. Motherboard Computer hardware faults can often be identified with debugging cards, saving time by eliminating the need for trial-and-error testing. While some issues can be correctly identified by beep codes, system error messages, and experience, IT specialists might require a more complex troubleshooting method to fix complicated defects.



![How to Test Motherboard without CPU? 4 Methods [2024]](https://www.ingameloop.com/wp-content/uploads/How-to-Test-Motherboard-without-CPU-450x257.jpg)
![Can Motherboard Affect FPS? Each Factor is Explained [2024]](https://www.ingameloop.com/wp-content/uploads/Can-Motherboard-Affect-FPS-450x257.jpg)

![Which Motherboard supports DDR5 RAM? [2024]](https://www.ingameloop.com/wp-content/uploads/Which-Motherboard-supports-DDR5-RAM-450x257.jpg)