
Motherboard manufacturers add the Secure Boot feature to ensure that only OEM-trusted devices boot at startup. The process to enable secure boot on Gigabyte motherboards is quite simple, and hopefully, it will take a few minutes of your precious time. In this detailed procedure, you will have to follow all the steps correctly; only then will you be able to Enable it.
Key Takeaways
- AMD Secure Boot is a feature that prevents unauthorized software from running on the system during boot-up.
- It works by verifying the digital signature of the firmware and operating system components against a trusted database stored in the motherboard.
- It can protect the system from malware, rootkits, and other threats that may compromise the integrity and security of the data and hardware.
- It can be enabled or disabled in the BIOS settings, depending on the user’s preference and compatibility with other devices and software.
- It is compatible with Windows 10 and Linux operating systems, as well as some AMD processors and chipsets.
Steps to Enable Secure Boot on Gigabyte Motherboards
1. Enable fTPM
If you need to get more familiar with fTPM, first let me tell you what it is; ftpm is a CPU hardware protection module implemented in the system firmware instead of a dedicated chip. In other words, it’s a specific type of solution that only runs while in a safe environment in a CPU. The sole purpose of having TPM is to solve all the bugs found in the firmware of the CPU. All the AMD and Intel-based latest CPUs have started arriving with fTPM.
Steps to Enable fTPM
- Enter the BIOS of the Motherboard by pressing “Del” while at the Logo Screen

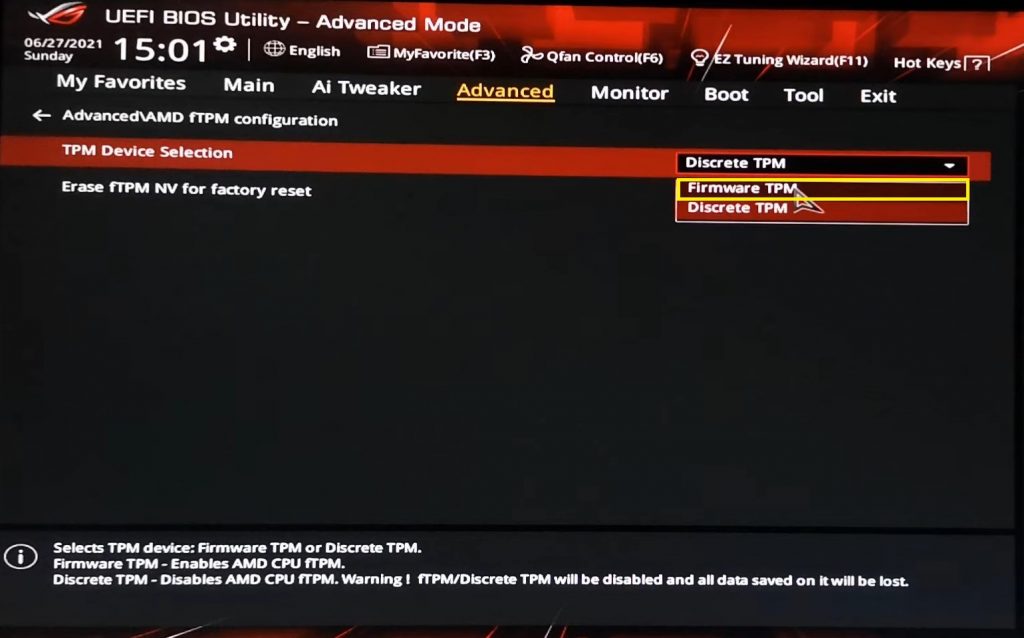
2. Select AMD fTPM Configuration in the Advanced Section of BIOS

3. Select Firmware TPM
2. Disable CSM
If you aren’t familiar with CSM, then here is what you should know, CSM stands for Compatibility support module. The purpose of CSM is that it allows legacy BIOS compatibility and allows you to use old-gen operating systems that no longer support UEFI.
Steps to Disable CSM
- Enter Bios by pressing Del multiple times at the Logo Screen and then open BIOS and then Select CSM Support
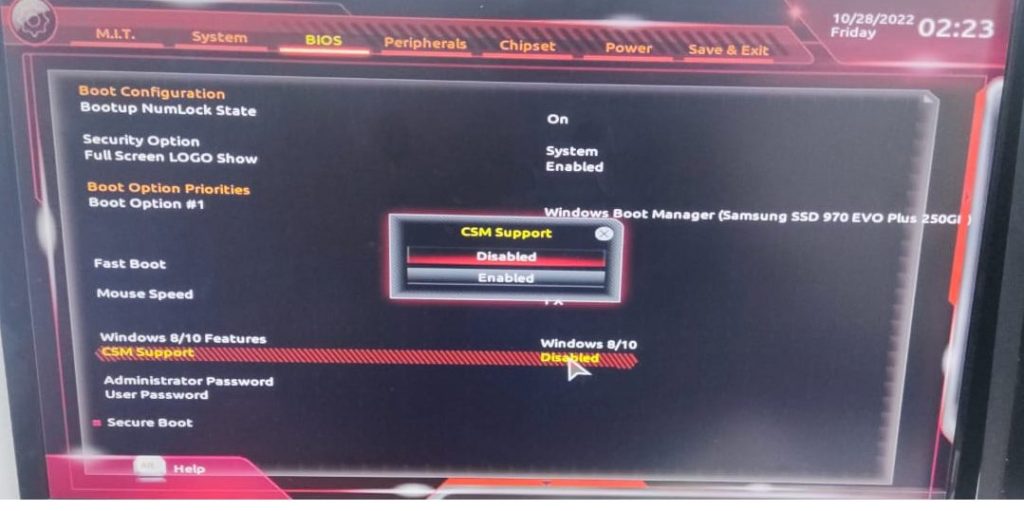
2. Select Disabled from CSM Support

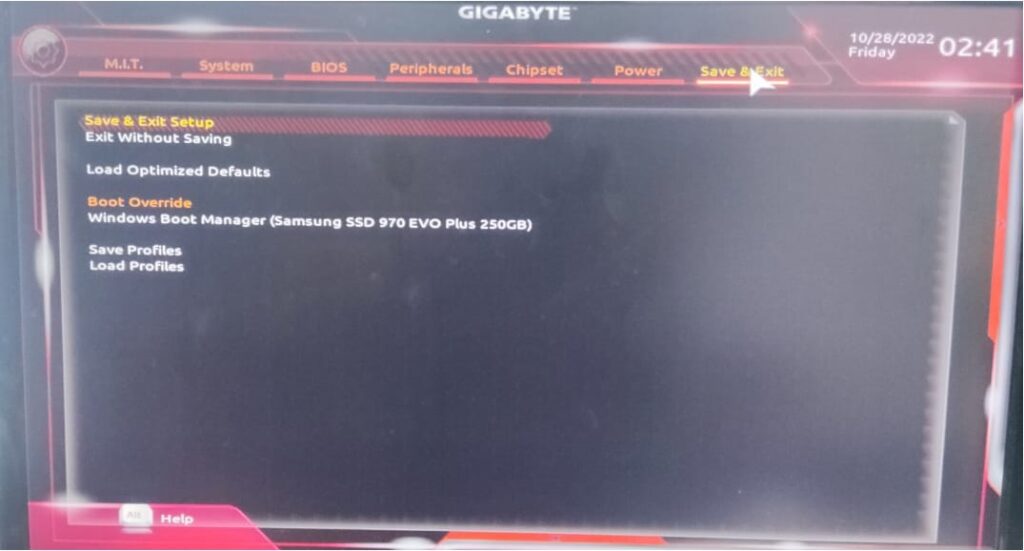
3. Goto Save & Exit
Select Save and Exit from Nav Bar, save the settings, and reboot.
4. Open Secure Boot under BIOS
- Select Secure Boot under the BIOS Section
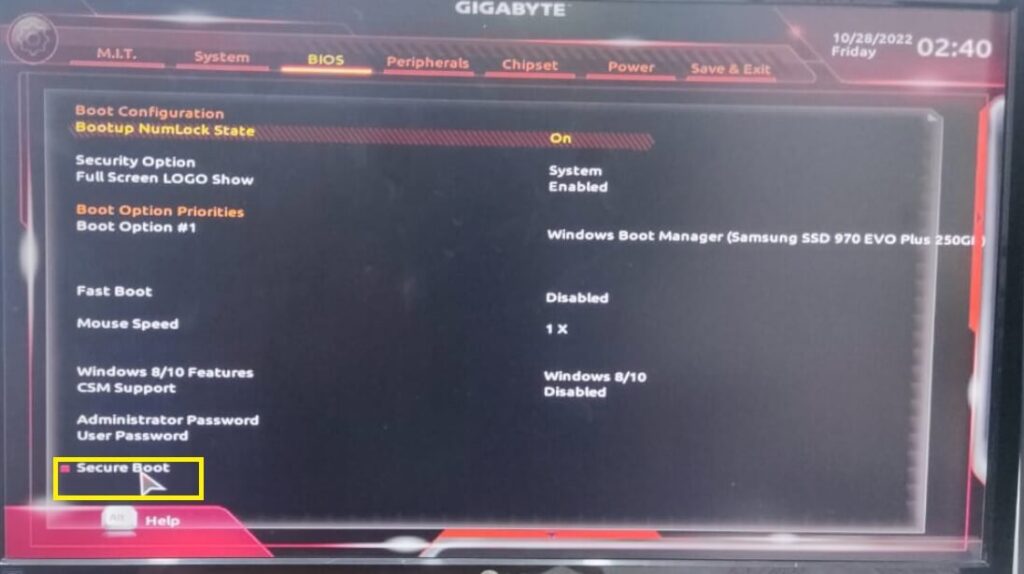
2. Change Secure Boot Customization to Custom and then Click on Restore factory keys
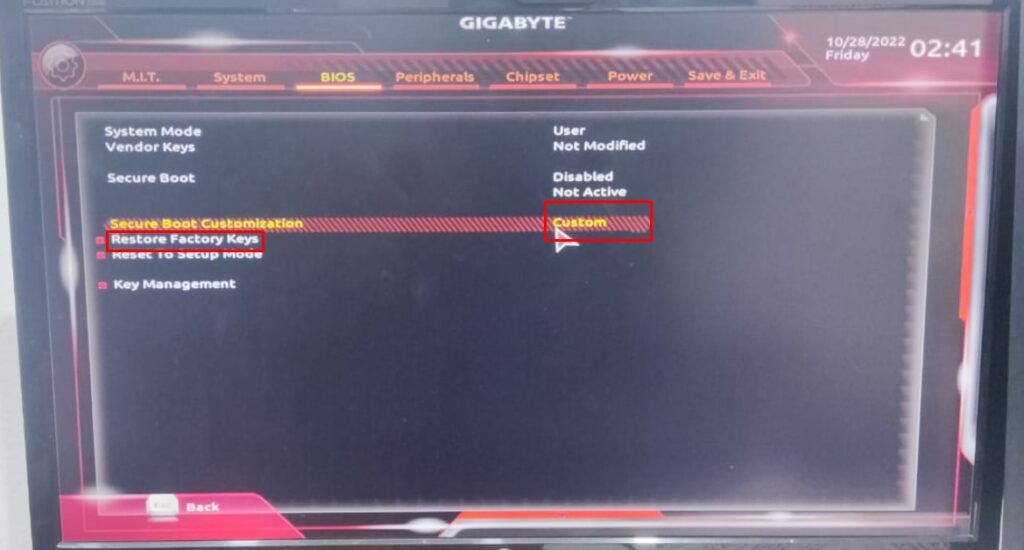
3. Click on Yes to reset without Saving
5. Changing Secure Mode state back to Standard
When BIOS restarts, access BIOS by pressing ‘DEL’ and Changing Secure Boot Mode to Standard Mode, and after that, Select the option of Yes to restart without saving.
Checking If Secure Boot is Enabled on Windows
- Open Start Menu and write “msinfo”
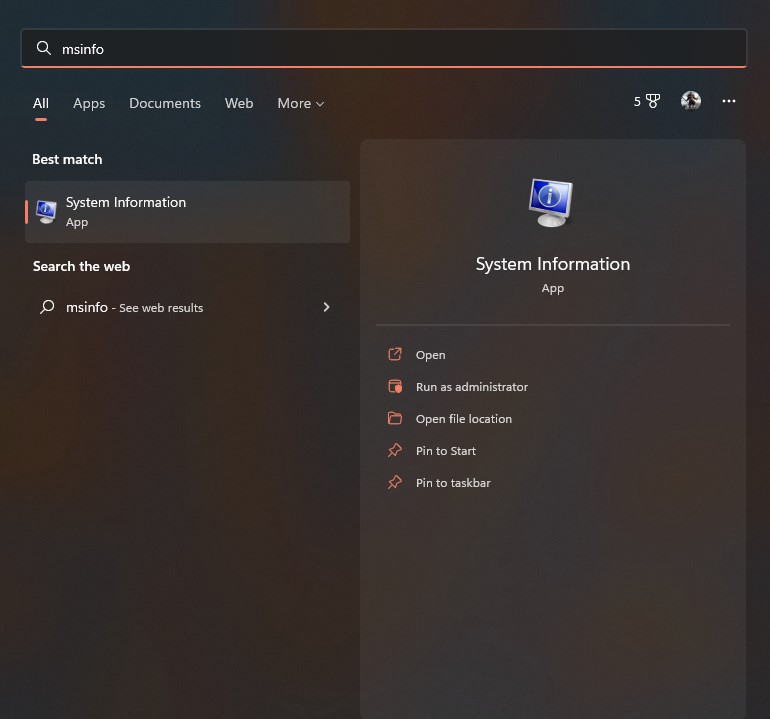
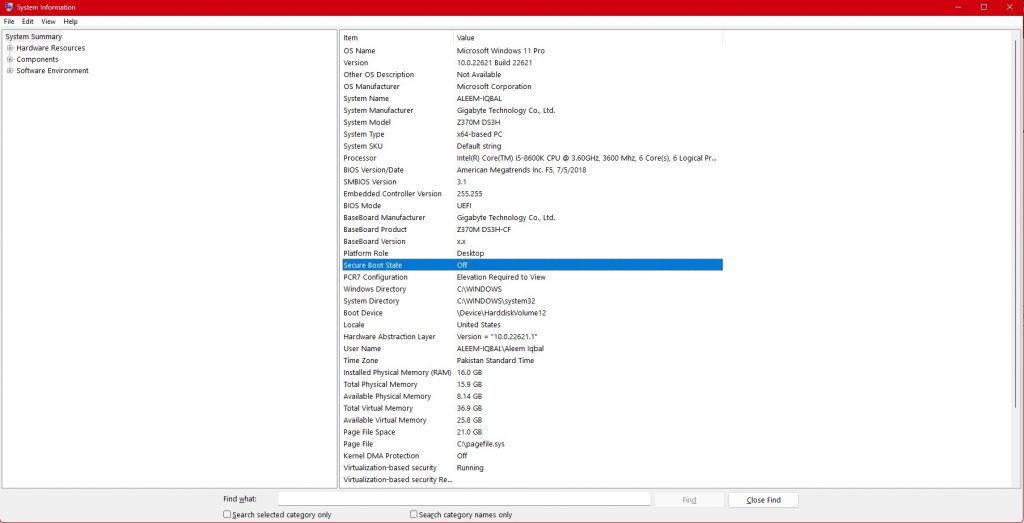
2. Open System Information and Check for Secure Boot
Conclusion
As you must have seen above, it isn’t difficult to follow instructions to enable Secure Boot in Gigabyte Motherboards isn’t much difficult. The procedure takes roughly five minutes. If you still have questions regarding Secure Boot, then make sure to ask them in the comment Section!!


![How to Test Motherboard without CPU? 4 Methods [2024]](https://www.ingameloop.com/wp-content/uploads/How-to-Test-Motherboard-without-CPU-450x257.jpg)
![Can Motherboard Affect FPS? Each Factor is Explained [2024]](https://www.ingameloop.com/wp-content/uploads/Can-Motherboard-Affect-FPS-450x257.jpg)
![Which Motherboard supports DDR5 RAM? [2024]](https://www.ingameloop.com/wp-content/uploads/Which-Motherboard-supports-DDR5-RAM-450x257.jpg)